The Campaign tool: introduction
If you would like to add the Campaign tool to your platform, please contact us for pricing and further information.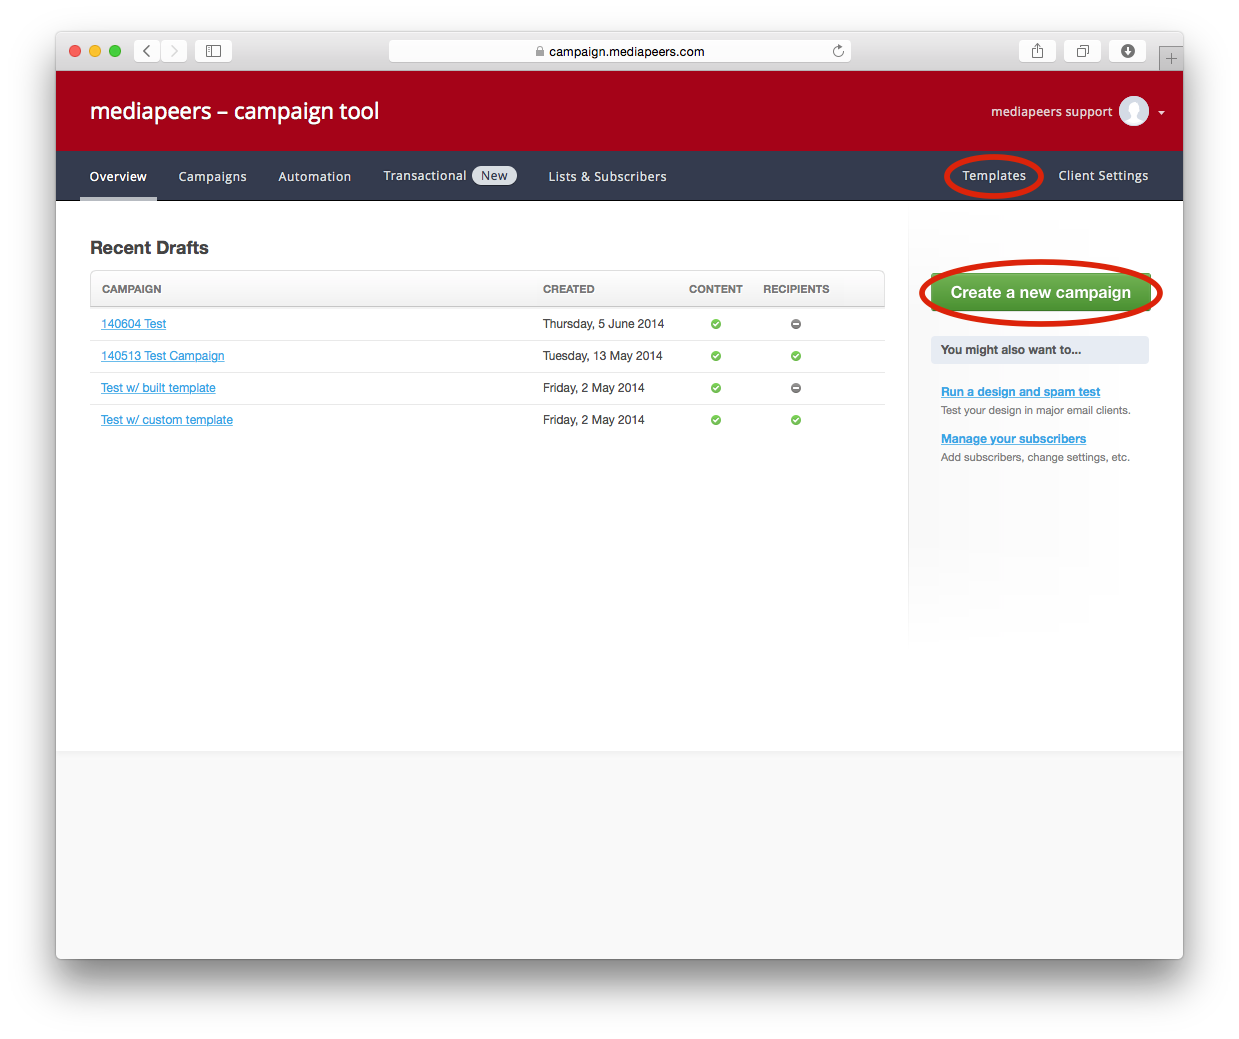
The Campaign tool
The Campaign tool is an email newsletter service that helps engage your audience and attract new customers by creating promotions or offers to share with your customers or subscriber lists. In just a few minutes you can create a professional-looking email with an offer to draw new clients. The tool also allows you to track the results of your campaigns with easy-to-read reports and stats.
Crucially, the Campaign tool leverages your Contacts Groups, filled with email addresses of your registered users as well as any further contact data you have entered, so there’s no need to handle a separate database of recipients – they will simply sync over from your MediaStore platform.
Once you’re set up, login to the Campaign tool using the credentials specific to the tool which will be supplied to you upon signing up for this service: https://mediapeers.createsend.com/
Creating an email template
There are a few ways to create an email template for the Campaign tool:
Build your own template using the Campaign tool’s WYSIWYG template builder: the template builder provided by Campaign Monitor is an easy way to build a template without prior knowledge of HTML or the necessary special newsletter HTML tags. Although it is a very effective tool, be aware that it’s not quite as flexible as direct HTML editing.
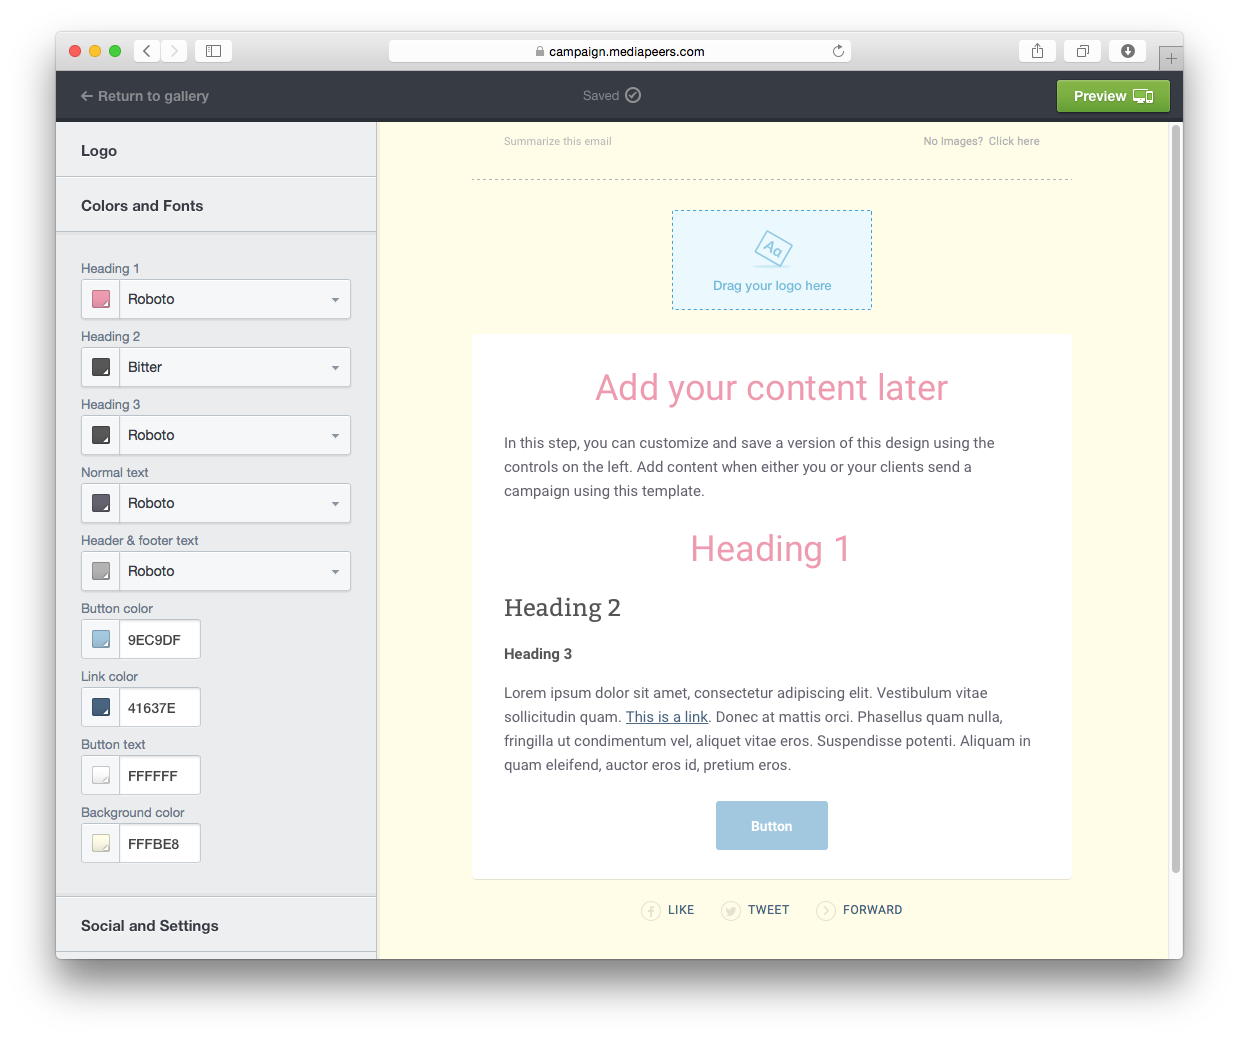
The template builder
The template builder is available via Templates > Gallery. Please select one of the available designs as a starting point; as you progress through the template builder, you’ll be able to customize many properties such as logo, colors, fonts, and structure.
It’s not possible to import an HTML template file and then modify it using the template builder.Take one of the available free default templates and modify the code manually: Campaign Monitor, our technical service provider, offers many free HTML templates that can be downloaded and modified to your liking. They include all the necessary code, so all you need to do is change the visuals the way you wish.
Preview them here: http://www.campaignmonitor.com/templates/all/
Download them directly here: http://i3.campaignmonitor.com/assets/files/templates/complete_package-updated.zip
To import your template, open the Campaign tool, go to Templates > Import and follow the instructions. All images must be uploaded as a single ZIP file. The Campaign tool will alert you in case it detects any irregularities during the import.
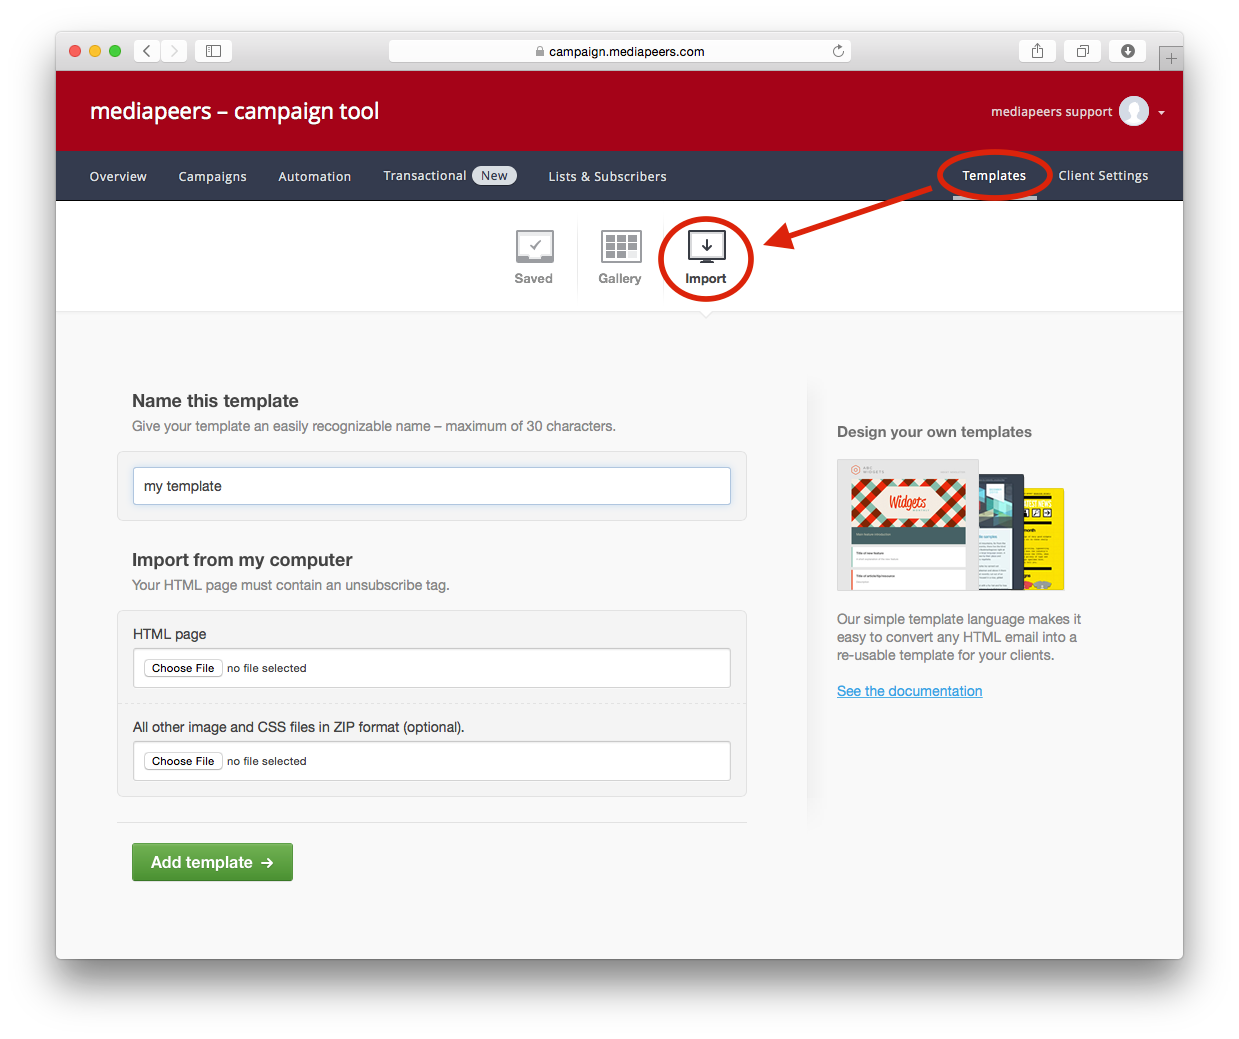
Importing a template
Create your own template from scratch (or from an existing HTML email template), incorporating the necessary Campaign Monitor-specific HTML tags, then import it into the Campaign tool. The Campaign tool will validate your template during upload and point out any deficiencies.
More information on the non-standard tags that can or need to be included in a template can be found here: http://www.campaignmonitor.com/create/editable-content/
To import your template, open the Campaign tool, go to Templates > Import and follow the instructions. All images must be uploaded as a single ZIP file. The Campaign tool will alert you in case it detects any irregularities during the import.
Using Contacts Groups to predefine groups of recipients

Contacts Groups on your MediaStore platform
Contacts Groups within MediaStore are designed to define recipient lists in the Campaign tool. Go to Groups > Contacts in order to view the Groups at your disposal or to create a new Group (using the Add New button).
You can add new people to an existing Contacts Group by opening it, navigating to its Users tab and using the Add dialog. Alternatively, you may use the Clients > Users section and use Actions > Add to Group from there.
All Groups in Groups > Contacts are automatically synchronized with the Campaign Tool, meaning that these Groups can be used to maintain up-to-date recipient lists directly in MediaStore. In the Campaign tool, view the Lists & Subscribers tab for an overview of all currently synchronized contacts and lists.
If your updated data from the Clients section in MediaStore doesn’t immediately appear in the Campaign tool, please be patient as it may take a while for the data to be synchronized. The sync process from MediaStore to the Campaign tool will usually take place hourly.
The Lists & Subscribers view
Setting up and sending campaigns
Within the Campaign tool, click Create a new campaign in the Overview tab (or use the Campaigns tab) to set up a new campaign. You can choose from any drafts you have previously created, or create a new campaign from scratch. A step-by-step wizard will take you through the process: you’ll merely have to define Campaign, Content, Recipients and Delivery. Along the way, you will be able to use the templates and recipient lists you have previously set up.
If your campaign template cannot be modified and filled with content to your exact liking, most likely the template is missing the necessary Campaign Monitor-specific HTML tags at that position. To remedy this, the template needs to be edited accordingly and and then updated (using Templates > settings icon > Update). It is not possible to add content directly from MediaStore to a newsletter (in a similar way to Selections). If you are not receiving campaign emails sent to yourself, you may need to have the following outgoing email servers whitelisted in your IT infrastructure: https://help.campaignmonitor.com/whitelist-campaign-monitors-addressesViewing statistics for your campaign
In the Campaigns tab, open any previously sent campaign to view detailed reports. Here, open the individual links to determine e.g. opens by region or click-through rates by individual link.