Handbrake: introduction
A simple and efficient transcoding solution you can easily install and use yourself on your local computer is Handbrake, an open-source encoding tool free for personal and commercial use. It is capable of creating streamable H.264 MP4 files ideal for MediaStore. It accepts most common video file formats as well as DVDs and DVD ISO files.
Download Handbrake here: http://handbrake.fr/
The below instructions refer to Handbrake 0.9.8. It is possible that in subsequent versions, its user interface and scope of functionality may change, nonetheless it should easily be possible to adjust the relevant settings.Using Handbrake
To transcode your videos yourself, follow these steps:
- Briefly play back the source file(s) to ensure acceptable quality as well as completeness, plus presence and synchronicity of the desired audio track. Should you find any issues, please report back to the file’s provider before attempting a transcoding.
- Use the Source button (top left) to add a file, DVD, DVD folder or DVD ISO file. Alternatively, simply drag and drop it onto the Handbrake window.
- Prepare all settings as recommended (see below). Take care to adjust the Size and Cropping (in Picture / Picture Settings), as well as the Avg Bitrate (kbps) (in Video) and audio Bitrate (in Audio) to suit the source file. See below for more information and recommended values.
- Click Start to start the encoding process.
- If you’d like to create an encoding queue (e.g. to encode several files overnight), you can add additional files: for each file, repeat steps 2 and 3 and then click Add to Queue. You can track the progress of your encodings by clicking Show Queue.
- The transcoded file(s) will be deposited at the selected Destination.
- Briefly check the transcoded file(s) for irregularities (such as asynchronous audio) before uploading it. If any irregularities should appear, please double-check the source file and encoding settings.
Recommended settings
In order to achieve the ideal streaming format, please use these settings in Handbrake, which you can also save as presets for repeated usage:
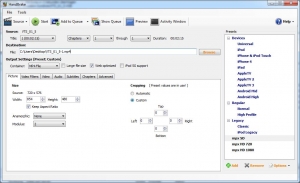
- Picture tab (Mac: pop-up window Picture Settings):
- Size:
- For 4K source files: 3840 x 2160
- For HD source files: 1920 x 1080 (or 1280 x 720 if no higher input is available)
- For SD source files: 854 x 480 (if 16:9 aspect ratio) or 640 x 480 (if 4:3 aspect ratio)
- While the above are recommended, other sizes may be used depending on the source material
- Tick Keep aspect ratio and select Anamorphic: None
- Cropping: select Automatic to let Handbrake detect any black margins or letterboxing, or use Custom to manually crop the video. You can use the Preview function to generate a sample of what your transcoded video will look like. Please also see further hints in the Cropping section below.
Handbrake: Picture tab
- Size:
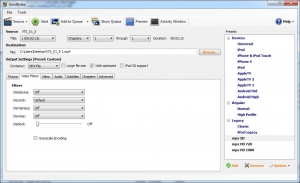
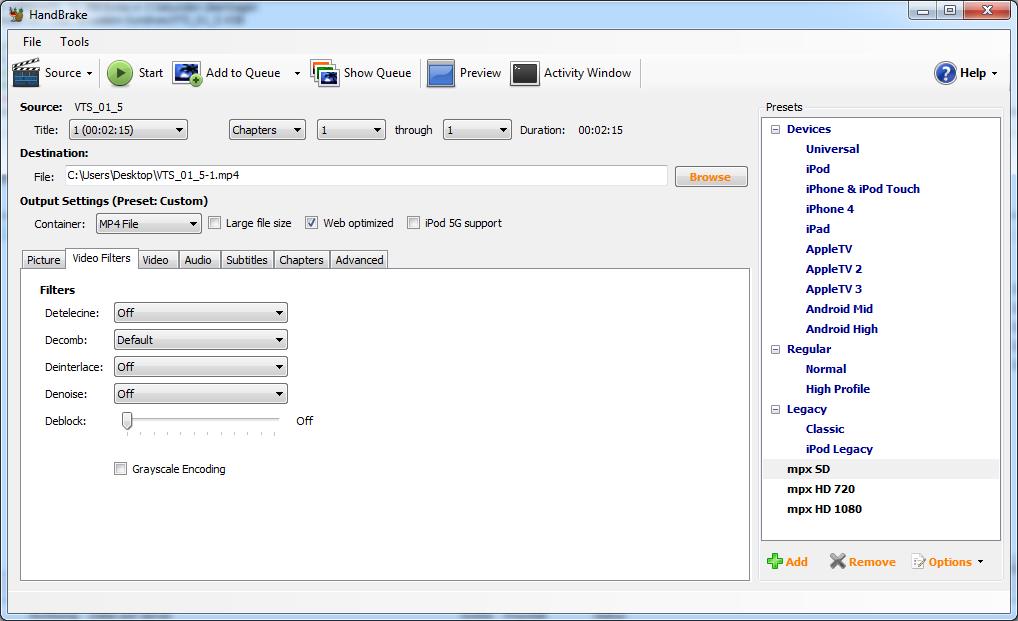
- Filters / Video filters tab (Mac: part of the pop-up window Picture Settings):
- Detelecine: Off
- Decomb: Default
- Deinterlace: Off
- Denoise: Off
- Grayscale Encoding: not ticked
Handbrake: Filters tab
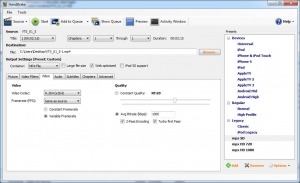
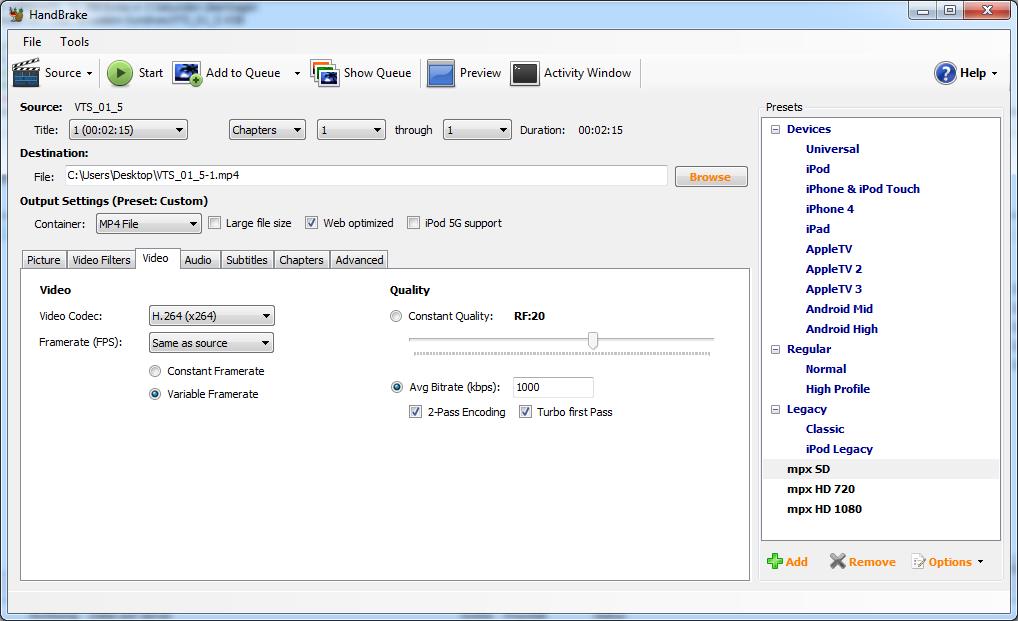
- Video tab:
- Video Codec: H.264 (x264)
- Framerate (FPS): Same as source
- Optimise video: tick Use Advanced Tab instead
- Tick 2-Pass Encoding and Turbo first pass
- Select Avg Bitrate (kbps) and enter one of these values:
- For 4k target files: 10000
- For HD target files: 5000 (or 2500 for 1280 x 720 target resolution)
- For SD target files: 1500
Handbrake: Video tab
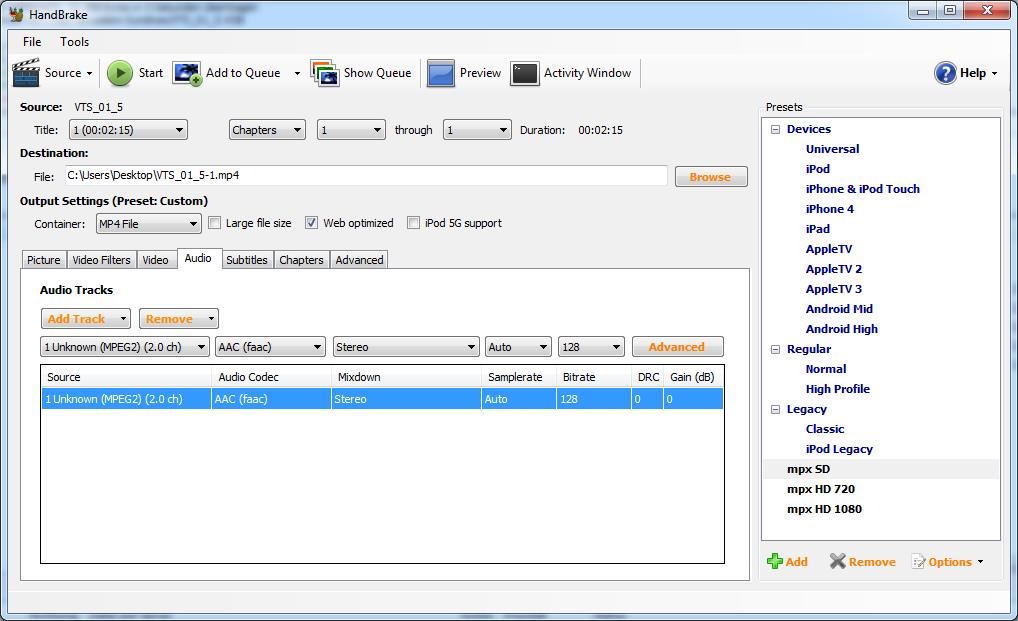
- Audio tab:
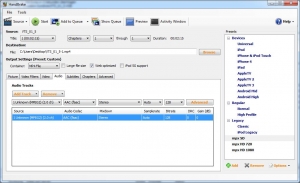
- Audio codec: AAC (faac)
- Mixdown: Stereo
- Bitrate: 192
Handbrake: Audio tab
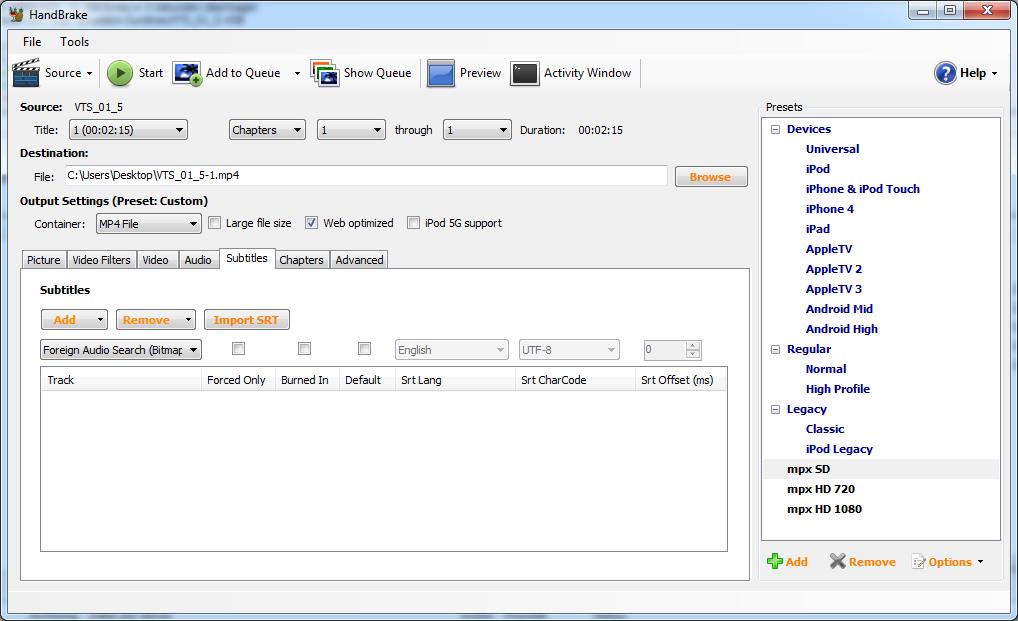
- Subtitles tab:
- Leave all values unchanged (unless your source file includes a non-burned in subtitle track that you’d like to burn in, which is usually not the case; if this scenario does apply, select the subtitle track and tick Burned In)

Handbrake: Subtitles tab
- Leave all values unchanged (unless your source file includes a non-burned in subtitle track that you’d like to burn in, which is usually not the case; if this scenario does apply, select the subtitle track and tick Burned In)
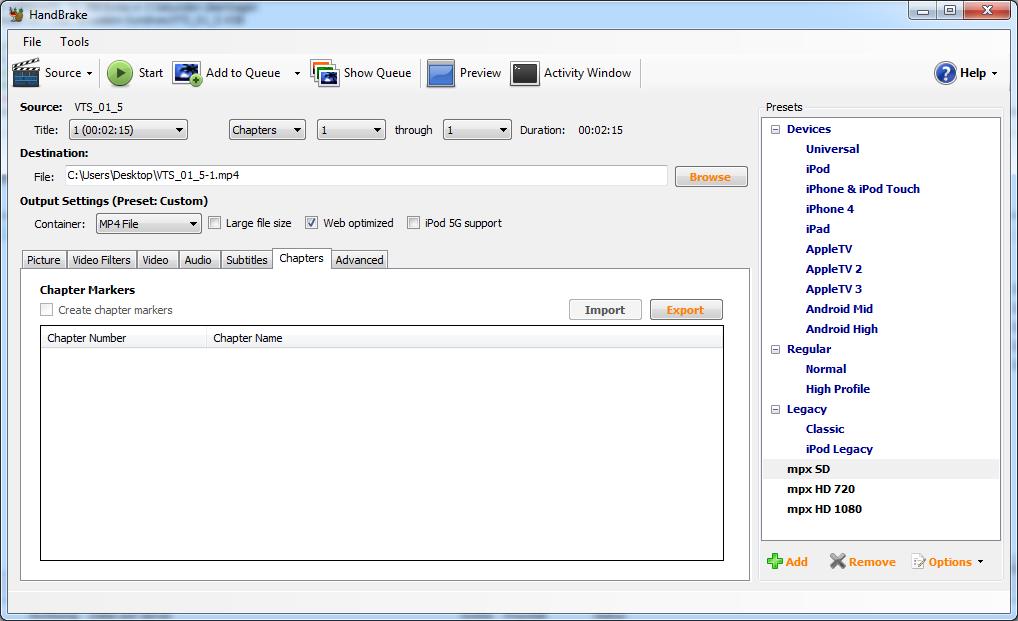
- Chapters tab:
- Leave all values unchanged
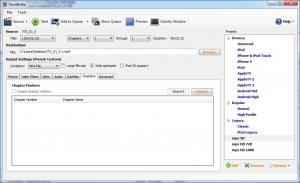
Handbrake: Chapters tab
- Leave all values unchanged
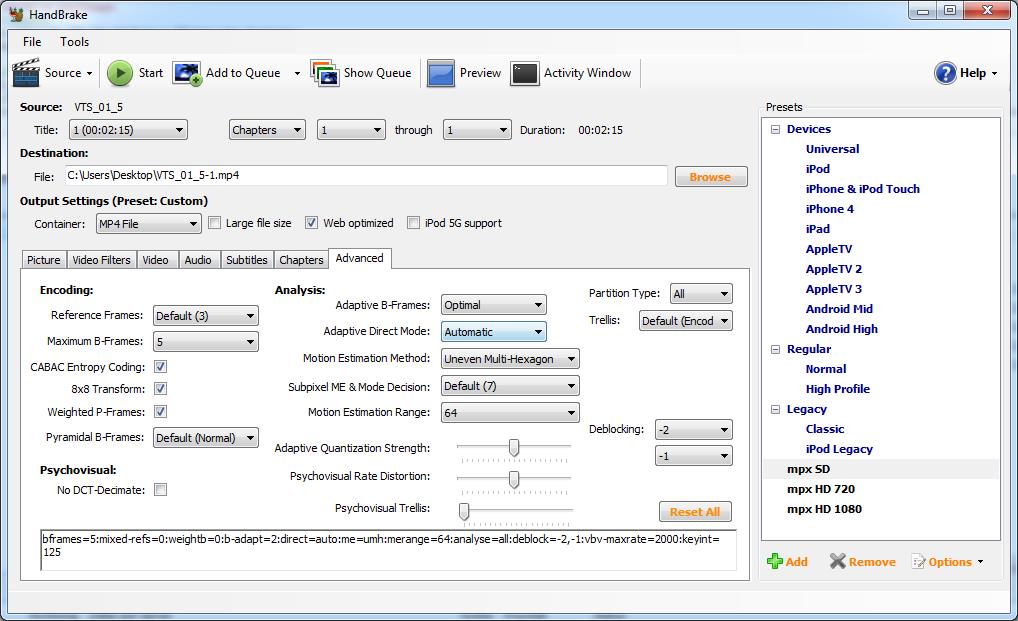
- Advanced tab:
- Encoding:
- Reference Frames: Default (3)
- Maximum B-Frames: 5
- CABAC Entropy Coding: ticked
- 8×8 Transform: ticked
- Weighted P-Frames: ticked
- Pyramidal B-Framed: Default (Normal)
- Psychovisual:
- No DCT-Decimate: not ticked
- Analysis:
- Adaptive B-Frames: Optimal
- Adaptive Direct Mode: Automatic
- Motion Estimation Method: Uneven Multi-Hexagon
- Subpixel ME & Mode Decision: Default (7)
- Motion Estimation Range: 64
- Partition Type: All
- Trellis: Default (Encode Only)
- Deblocking: -2, -1
- x264 advanced options string (text field at the bottom):
- Add the following custom settings at the end of any text that is already present, without any space (and without quotation marks):
- For HD target files: “:vbv-maxrate=7000:keyint=125”
- For SD target files: “:vbv-maxrate=2000:keyint=125”
Handbrake: Advanced tab
- Add the following custom settings at the end of any text that is already present, without any space (and without quotation marks):
- Encoding:

Once you’ve entered all settings, you can save them as a preset for future usage by clicking the “+” icon (right side of the window). It is advisable to save one preset for SD transcoding and one preset for HD transcoding (see above for more information and recommended values).