Creating and granting access to Organizations and Users: introduction
Organizations and Users can be granted access to the platform in two ways:
- They submit a registration on the public portion of your client site. This will create a Pending User entry which you can review in order to either grant access or refuse.
- You may enter the required Organization and User entries yourself in order to invite the User.
In both cases, if you wish to grant access to a User, you will need to take the required steps to set up a User entry and/or change its initial Status.
Please note that the Access level given to new Users by default usually should not be changed.Processing Pending Users
Whenever a client submits a registration on the public portion of your client site, you will find a Pending User entry in Users > Users. The following Actions are available to process the User:
- Approve: The User will receive a signup link via email. Once they’ve followed this and completed signup, they will have access to the platform in accordance with the Role they were assigned.
Once you’ve clicked the Approve action, you will be presented with a dialog permitting you to review the User’s details before you Update the entry and then Approve. For new clients, you should use this opportunity to set the Role to Client. The recipient will receive a signup link via email; once they have completed signup, the User status will change from Invited to Active:- Organization: By default, this field will show the Organization the User has provided upon registering. You may, however, change the Organization the User will be associated with. Changing the Organization may be useful, for instance, in case other Users from the same company are already registered.
- Role: Defines the Role the User will receive, and thereby whether they will be able to access both the client and admin sites, or the client site only.
- Responsible User: The User specified here will receive alerts if the new User’s entry is changed or removed.
- Tags: These optional tags may be used to impact search in the Users > Users section.
- Reject: A rejection message will be sent to the User, and they will not be granted access.
- Delete: This action deletes the User without notifying them.
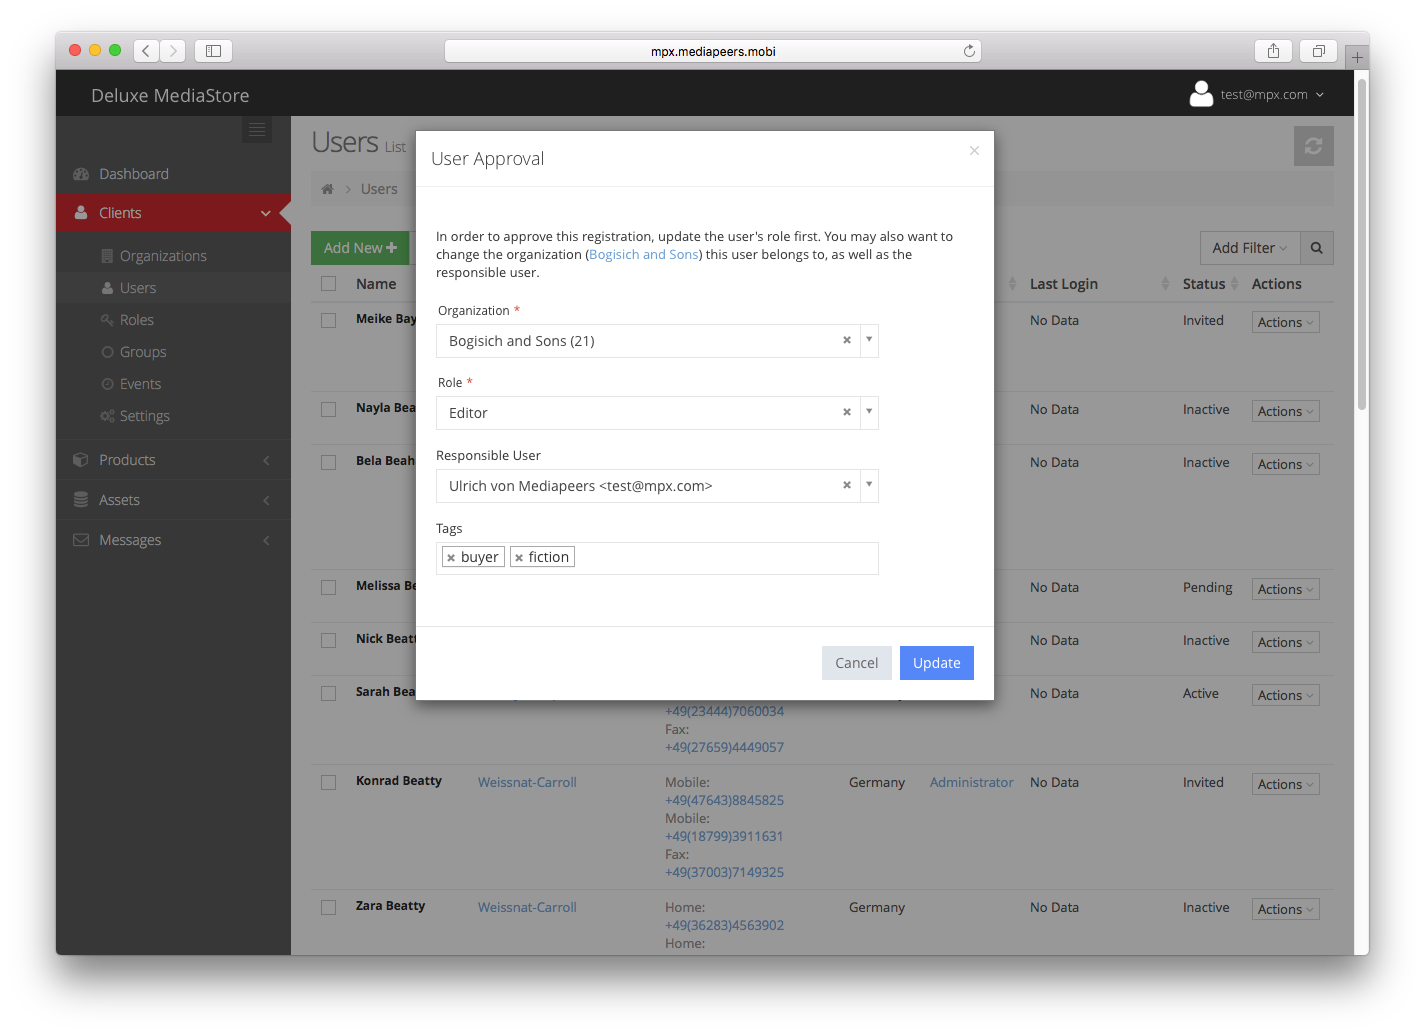
When approving a User, be sure select the correct data
Adding a new Organization
If you’d like to add a User for whom no Organization entry is present yet, please follow these steps to set up the Organization entry first.
- Go to Users > Organizations.
- Click Add New.
- In the entry wizard, enter the Organization’s details. Mandatory fields are marked *. Click Next to advance within the entry wizard. For sections such as Addresses and Banks, you may use the Add and Remove buttons to manage one or multiple items.
- At the final step, click Submit to create the Organization entry.
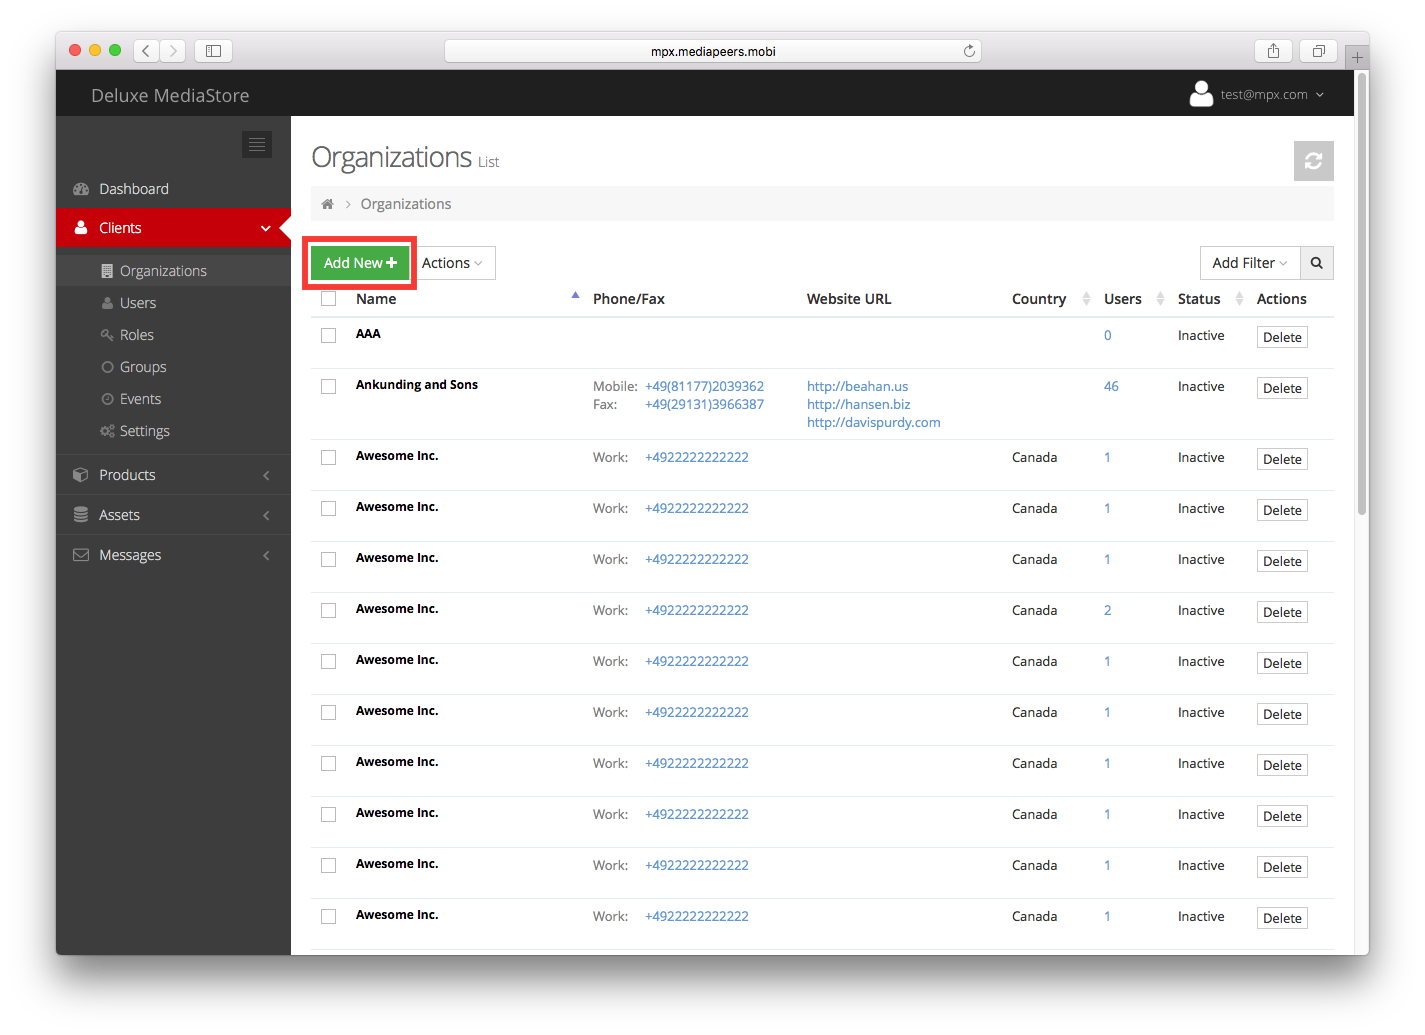
Click Add New to create an Organization
Adding a new User
Please follow these steps to add a User to an existing Organization.
Since each User must be assigned to an Organization, ensure that an Organization entry for the User you are about to create is already present (see above for how to set up an Organization).- Go to Users > Users.
- Click Add New.
- In the entry wizard, enter the User’s details. Mandatory fields are marked *. Be sure to select the Organization the User should be associated with, as well as the Role they should have. Click Next to advance within the entry wizard. For sections such as Phones, you may use the Add and Remove buttons to manage one or multiple items.
- At the final step, click Submit to create the User entry.
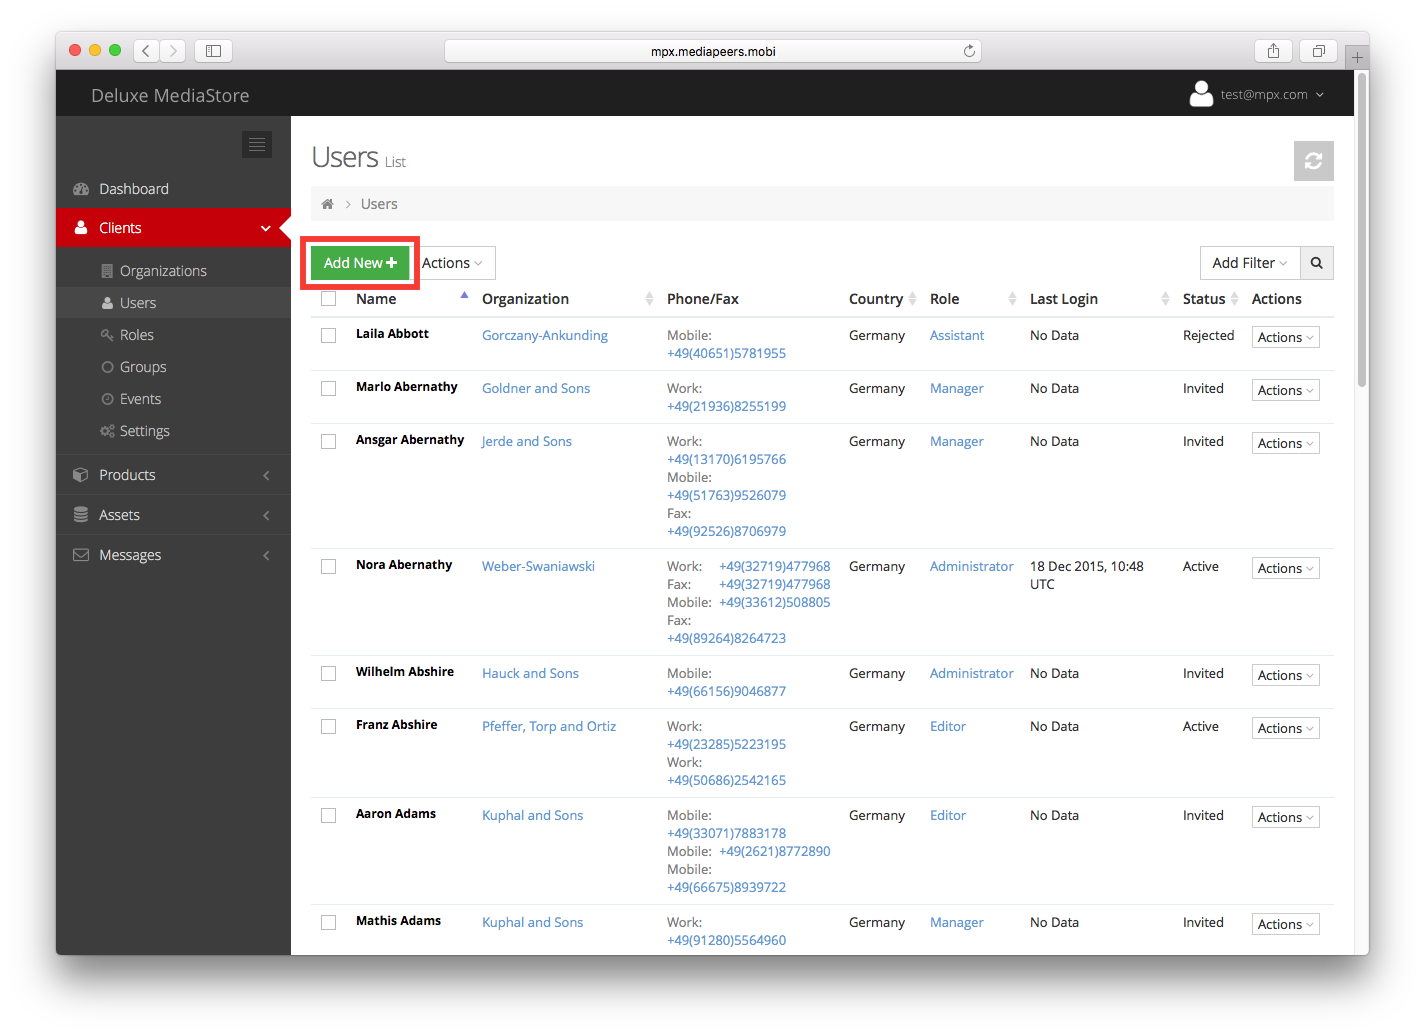
Click Add New to add a User
Inviting a User
In order to invite a new User, an entry for the User (as well as that User’s Organization) must be present (see above).Once both the Organization and the User have been created, go to Users > Users and click Actions > Invite for the User you’d like to invite. In the ensuing dialog, choose the Role the User should receive and Update (if not already set), and finally Approve in order to dispatch an invitation message via email.
The recipient will have to follow the link in the invitation email to complete signup. Once they have done so, the User’s status will change from Invited to Active.
The User will need to complete signup themselves through the link provided in the invitation message. Only after doing so will they be able to access the platform.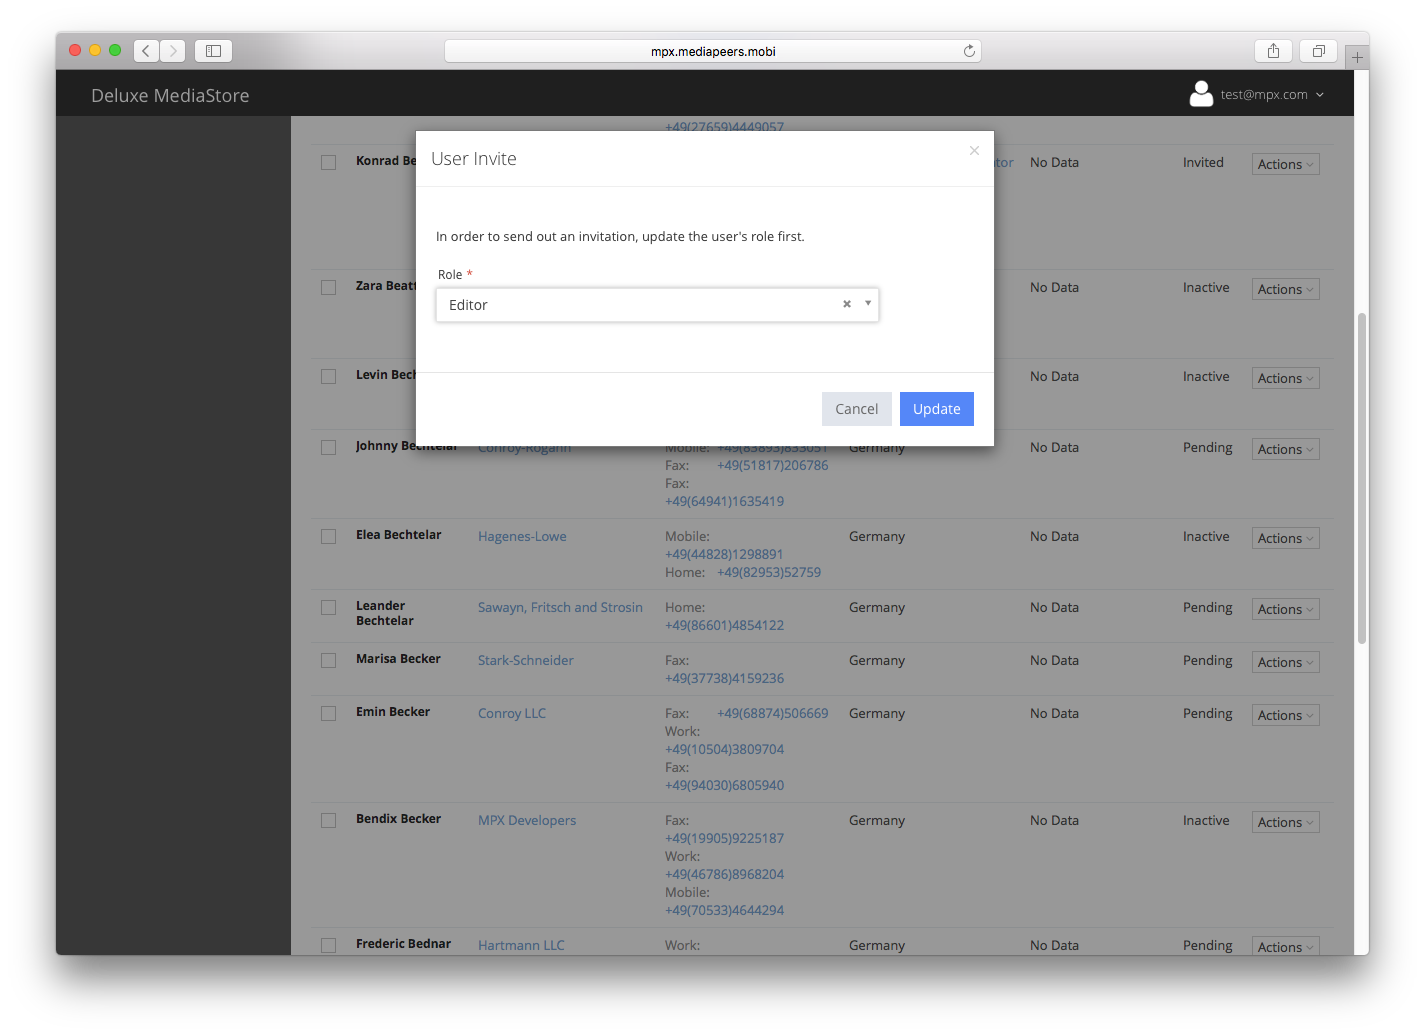
Choose the invitee’s Role before dispatching the invite email